In TaskOrbiter, you can manage your Workspace with only a few clicks. Whether you need to switch between multiple Workspaces, update your avatar or update billing information, you can do all of this with your options in the sidebar.
How to manage your Workspace
Note: Making edits to areas such as billing information, avatar or name require you to be the workspace owner or admin. If you don’t have access, you will need to contact the owner or admin to complete these actions.
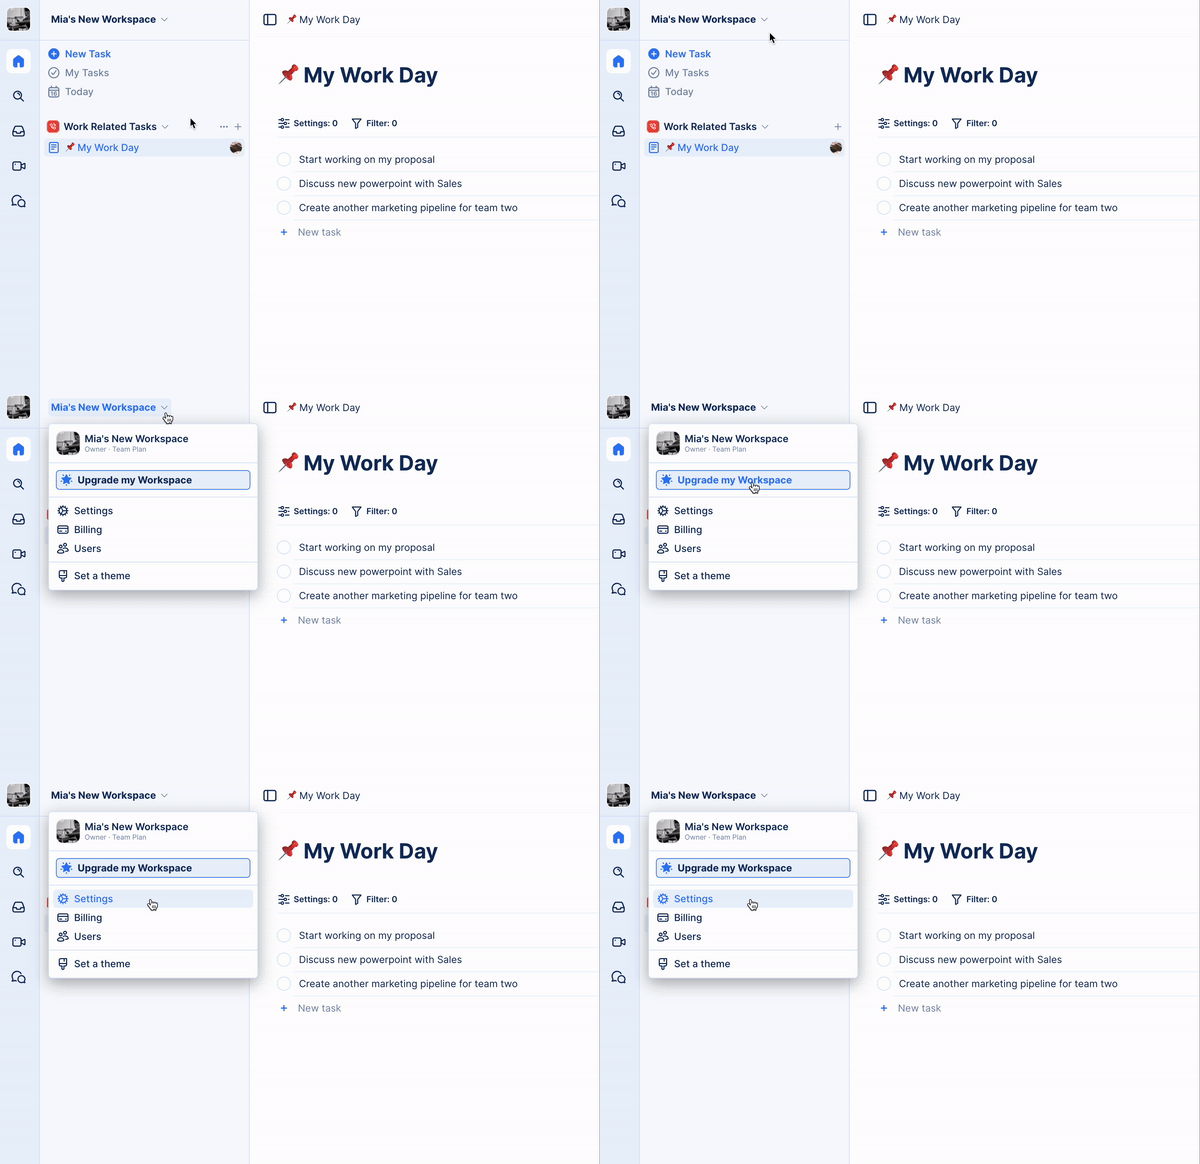
Getting to your settings

- Navigate to TaskOrbiter.
- Click your Workspace name in the top left corner of the dashboard.
- Click Settings.
- You’ll then be taken to your Workspace settings.
- From here you can make changes that you’ll learn about below such as updating, changing billing and more.
Editing your Workspace
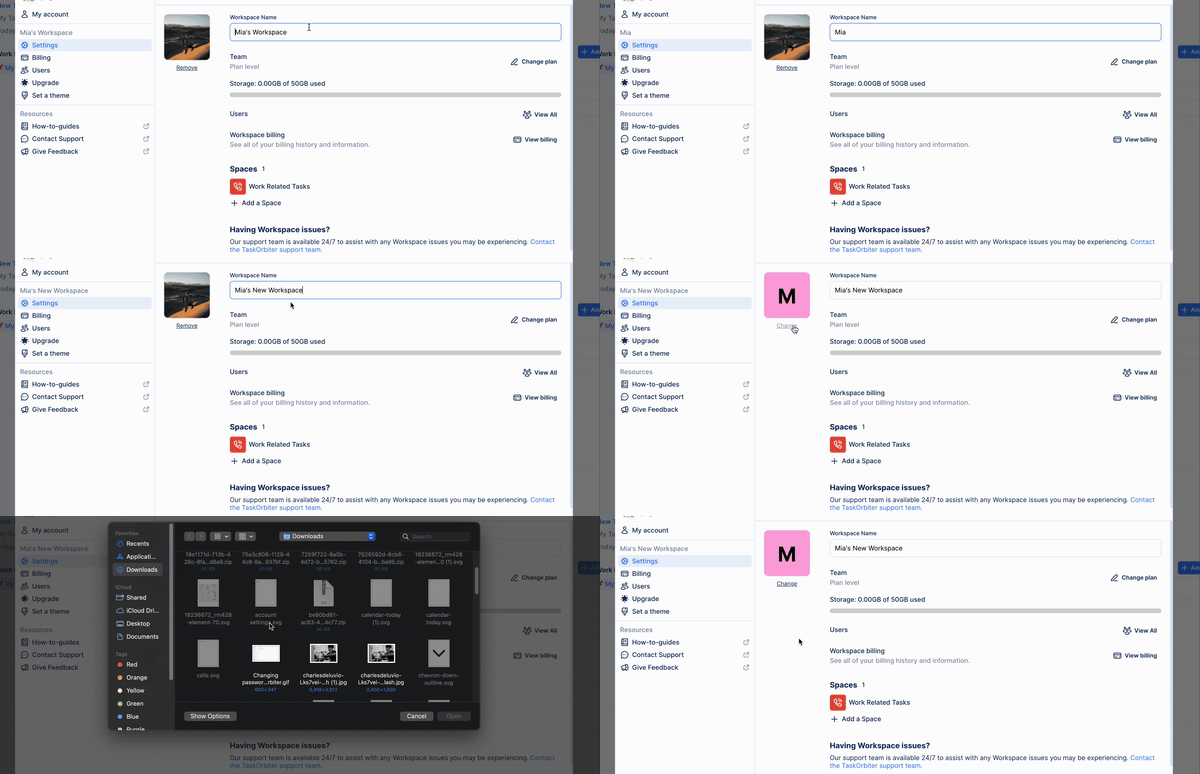
If you need to change the name or the avatar of your Workspace, you can do all of this in the same area. You can easily just type the new name of your Workspace and your dashboard will update immediately.

- Make sure you have your Workspace settings open.
- From here you can do the following:
- Update your Workspace name by typing into the field
- Remove or update your Workspace avatar by uploading your own photo.
- Keep in mind, all of these changes that are made are immediate.
Switching Workspaces
If you've created multiple Workspaces and need to switch between them, you can do this with just a few clicks!
- Click your Workspace avatar in the top left corner of the dashboard.
- Now your other Workspaces will appear below the one you are currently in.
- From here you can click whichever Workspace you would like to switch to.
Tip: Learn how to create another Workspace if you need further organize your work.
Was this article helpful?