In TaskOrbiter we’ve made it very simple to manage your Spaces that exist within your Workspace. You can find your Spaces in two different places; the first being your sidebar. From here you can see all of the Spaces you’ve created and add pages within them. The second place is in your Workspace Settings which is where you can make edits and/or delete a Space if you no longer need it.
How to manage your Spaces
Tip: Spaces are available on all plan levels but depending on which plan you’re on, your limitations may vary. learn more about Space limitations.
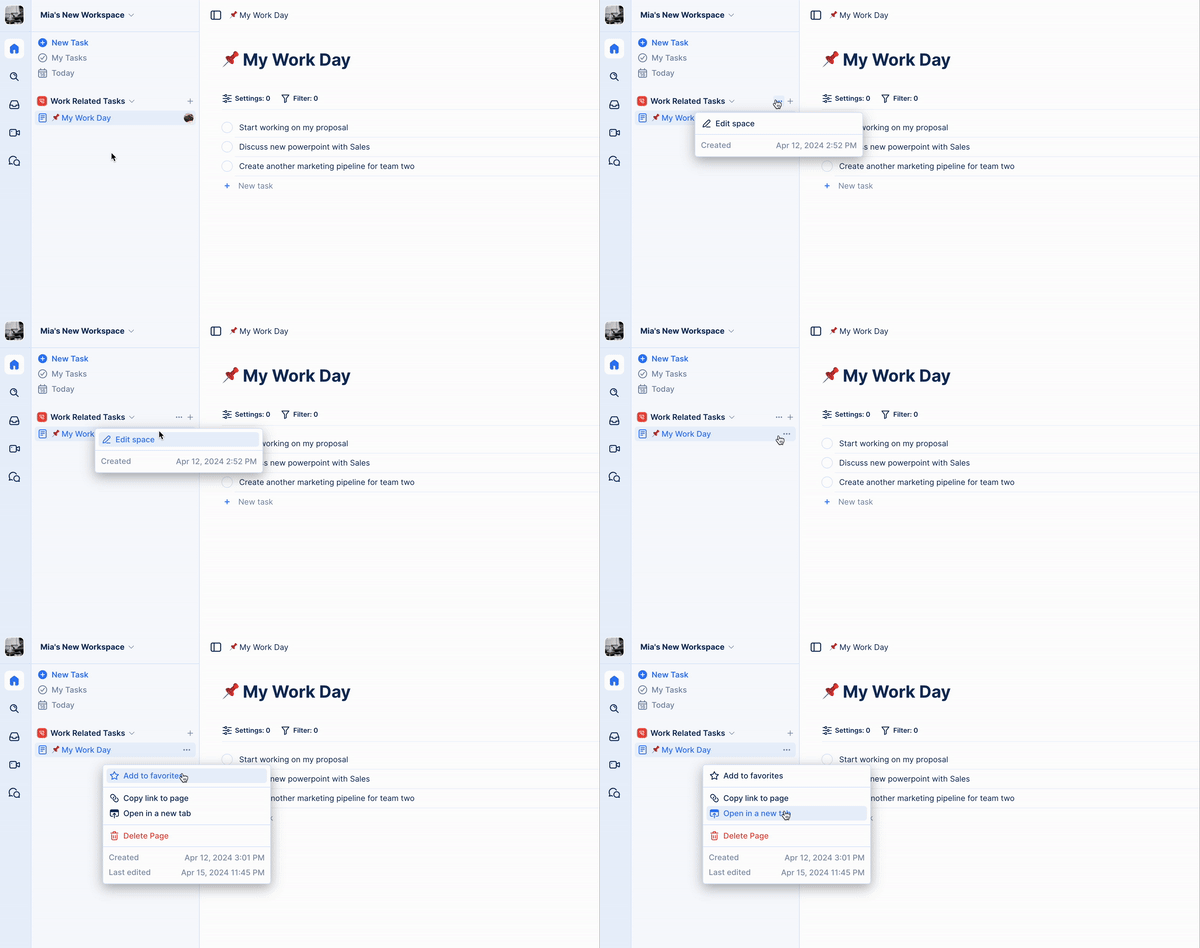
In the sidebar
In your dashboard, you can see all of the Spaces you've created (including your default Space).

- Make sure you have your sidebar opened.
- Under your sidebar options, you will see your Spaces and from here you can:
- Click the ellipsis button to edit your Space.
- Click the + plus button to add pages.
- You can delete pages from your Space.
- You will also have the option to do the following to your page:
- Add to favorites.
- Copy the link to your page.
- Open the page in a new tab.
- See when it was created and last edited.
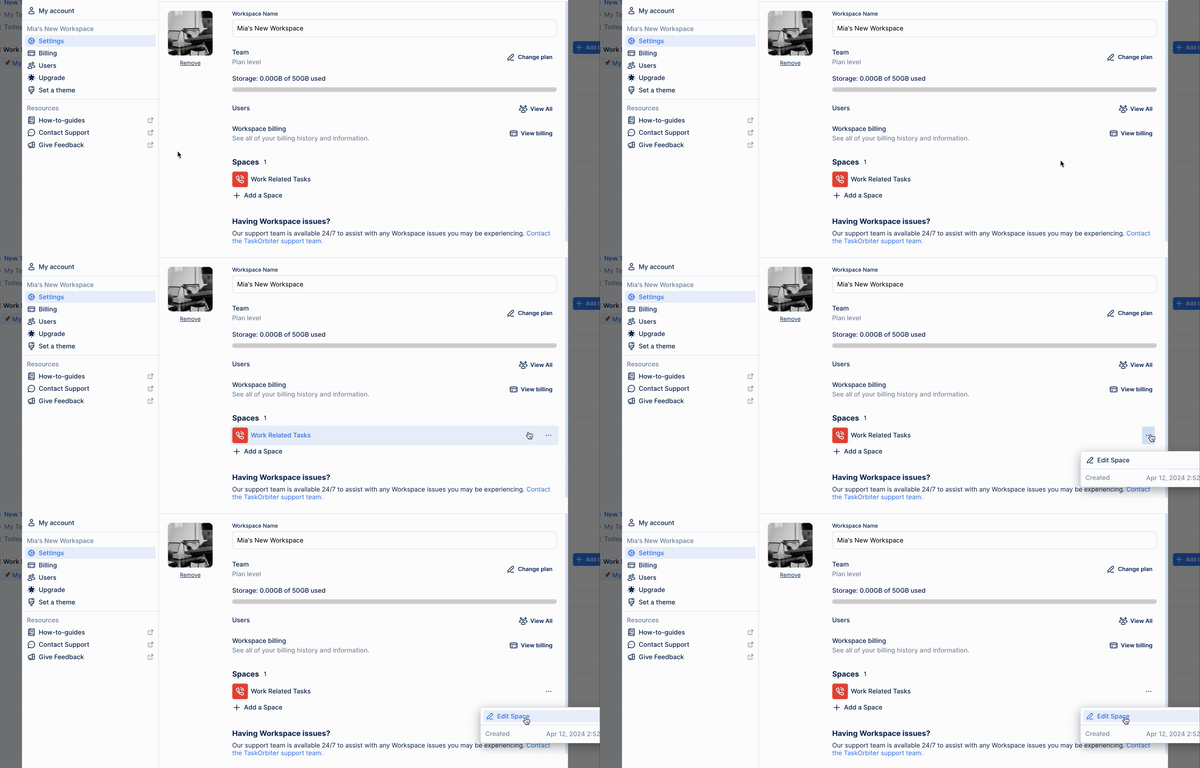
In Workspace settings
Here in your Workspace Settings you'll be able to make edits to your Space such as renaming, changing its color, icon and deleting.

- Click your Workspace name in the top left corner of the dashboard.
- You’ll then get your dropdown of options.
- Click Settings.
- You’ll then be taken to your WorkSpace Settings.
- From here, you can scroll down and you’ll see all of your Spaces listed out.
- You will see your default space which is what you get with every Workspace you create.
Note: If you’ve created a Space, you will have permission to edit/delete. If not, we recommend contacting the Workspace owner to make changes.
Was this article helpful?