Every page you create in TaskOrbiter will have a list and this is nothing more than a way to organize the tasks on that page. In this article we’ll go over how to create a list, customize your lists, your private My Task lists and putting a task on more than one list.
Introduction to Lists
Creating a list

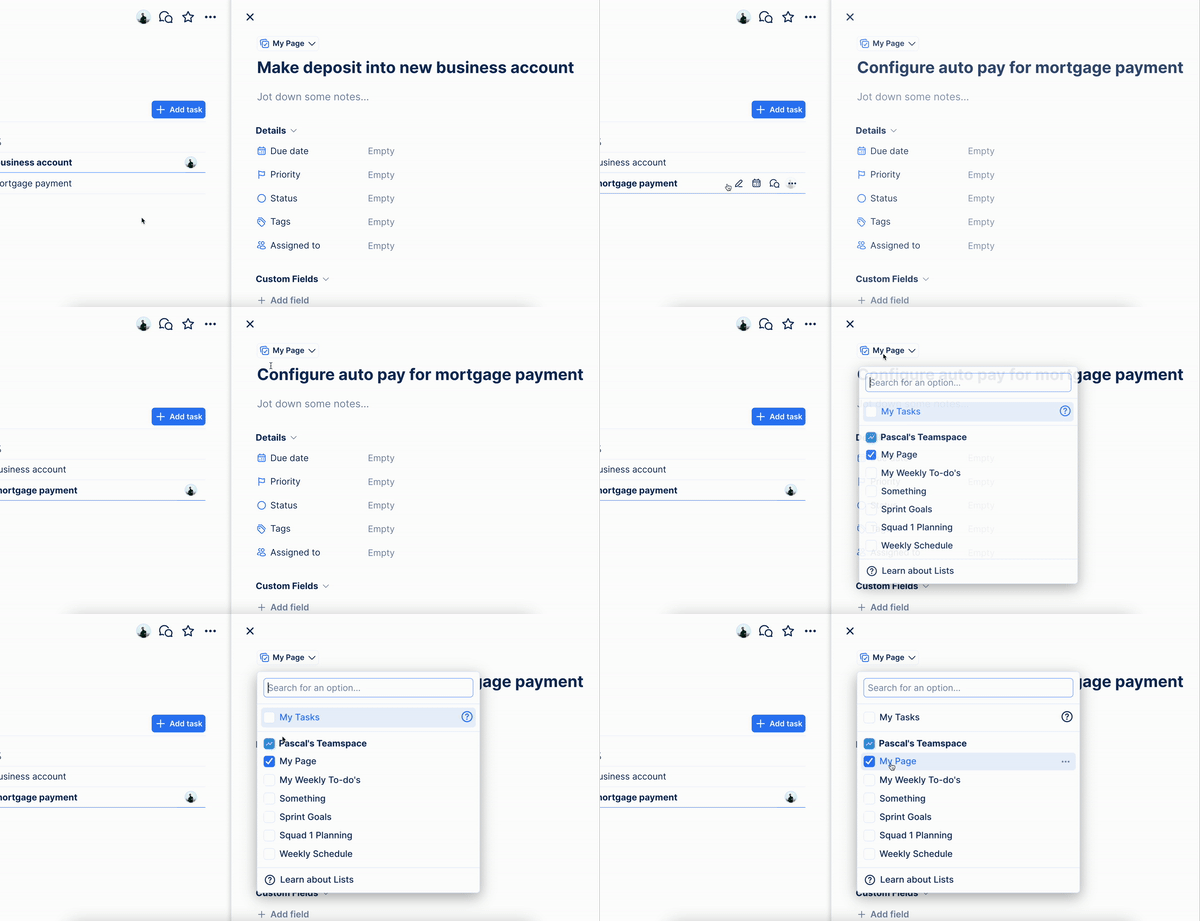
When you create a page in TaskOrbiter, the list will automatically be created. So for example, if you create a page called My Page and you add a task to that page, it will exist in the My Page list. You can see your list picker in the top left corner of every task and this is where you can edit where your task will be found.
Customizing your lists

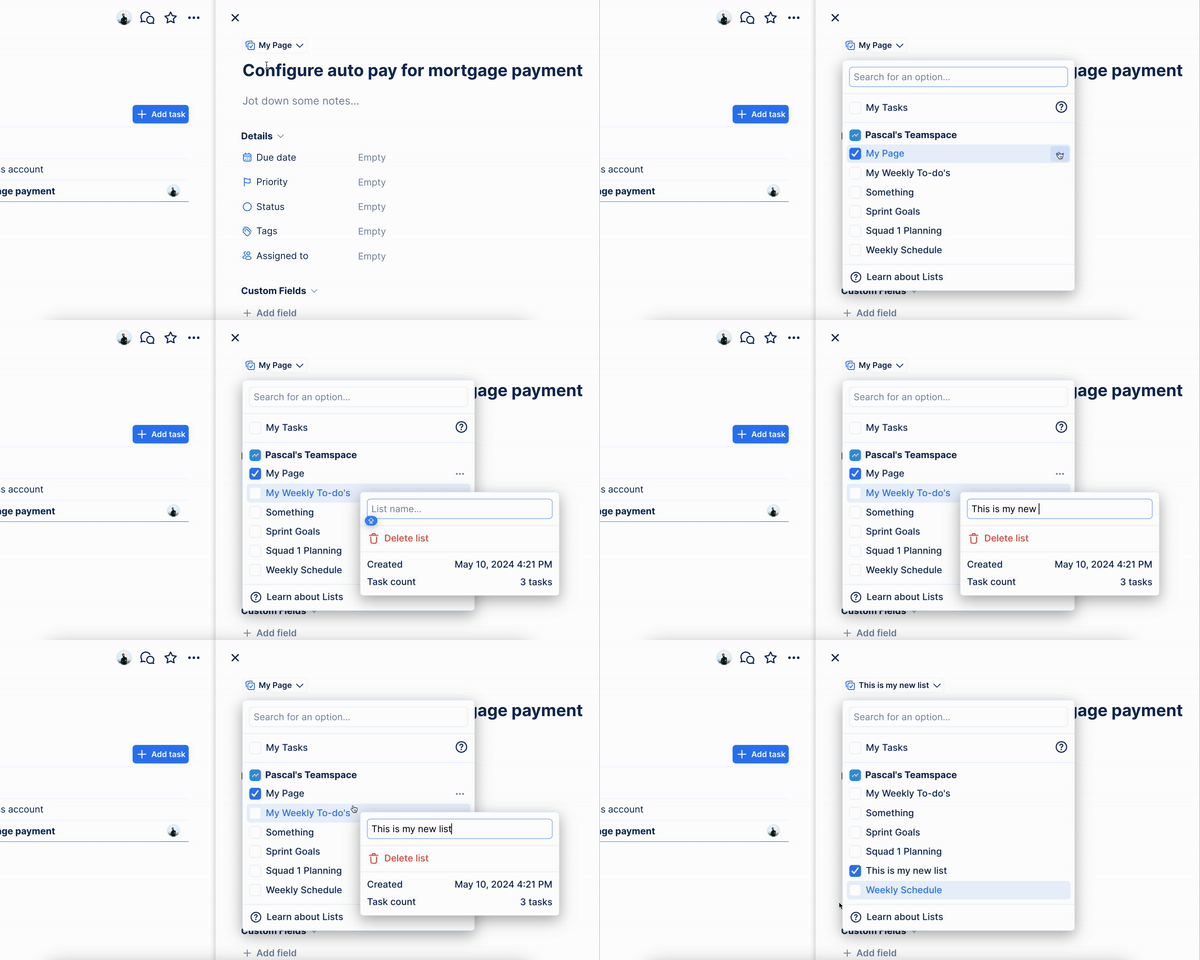
Once you have a list created, you can edit the title and see important details when clicking the three dot ellipsis button next to each name. From here you can see the date it was created, the number of tasks it has and the ability to delete the list.
My Tasks list

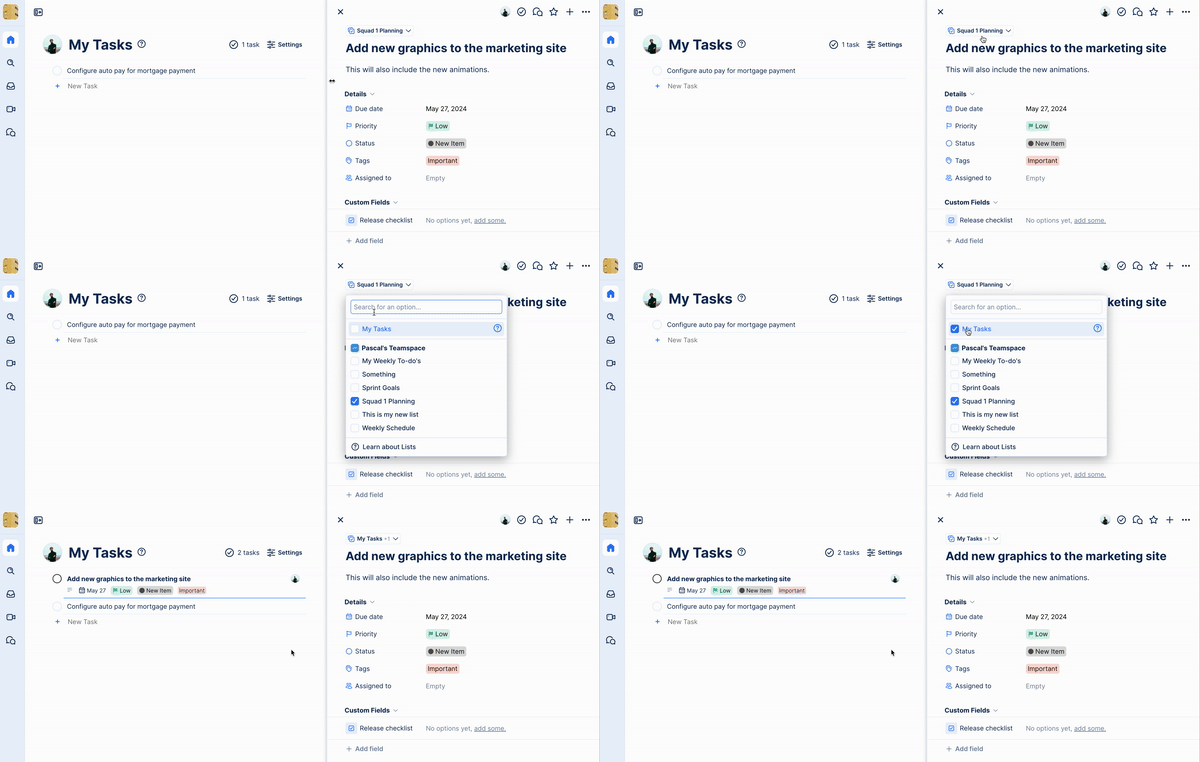
The My Tasks list provides you with the ability to organize tasks in My Tasks but it also offers the ability to make tasks private. When selecting lists in your list picker, you can choose more than one but if you want the task to be visible by you and no one else in your Workspace, select My Tasks.