Priorities and statuses are a great way to manage your tasks and ensure the right tasks get done first. In this article, we’re going to cover all you need to know about both priorities and statuses, because the experiences for both are very similar.
Priorities and statuses
Tip: Filtering by priority and/or status is a great way to focus on only the tasks that matter.
Creating a priority or status

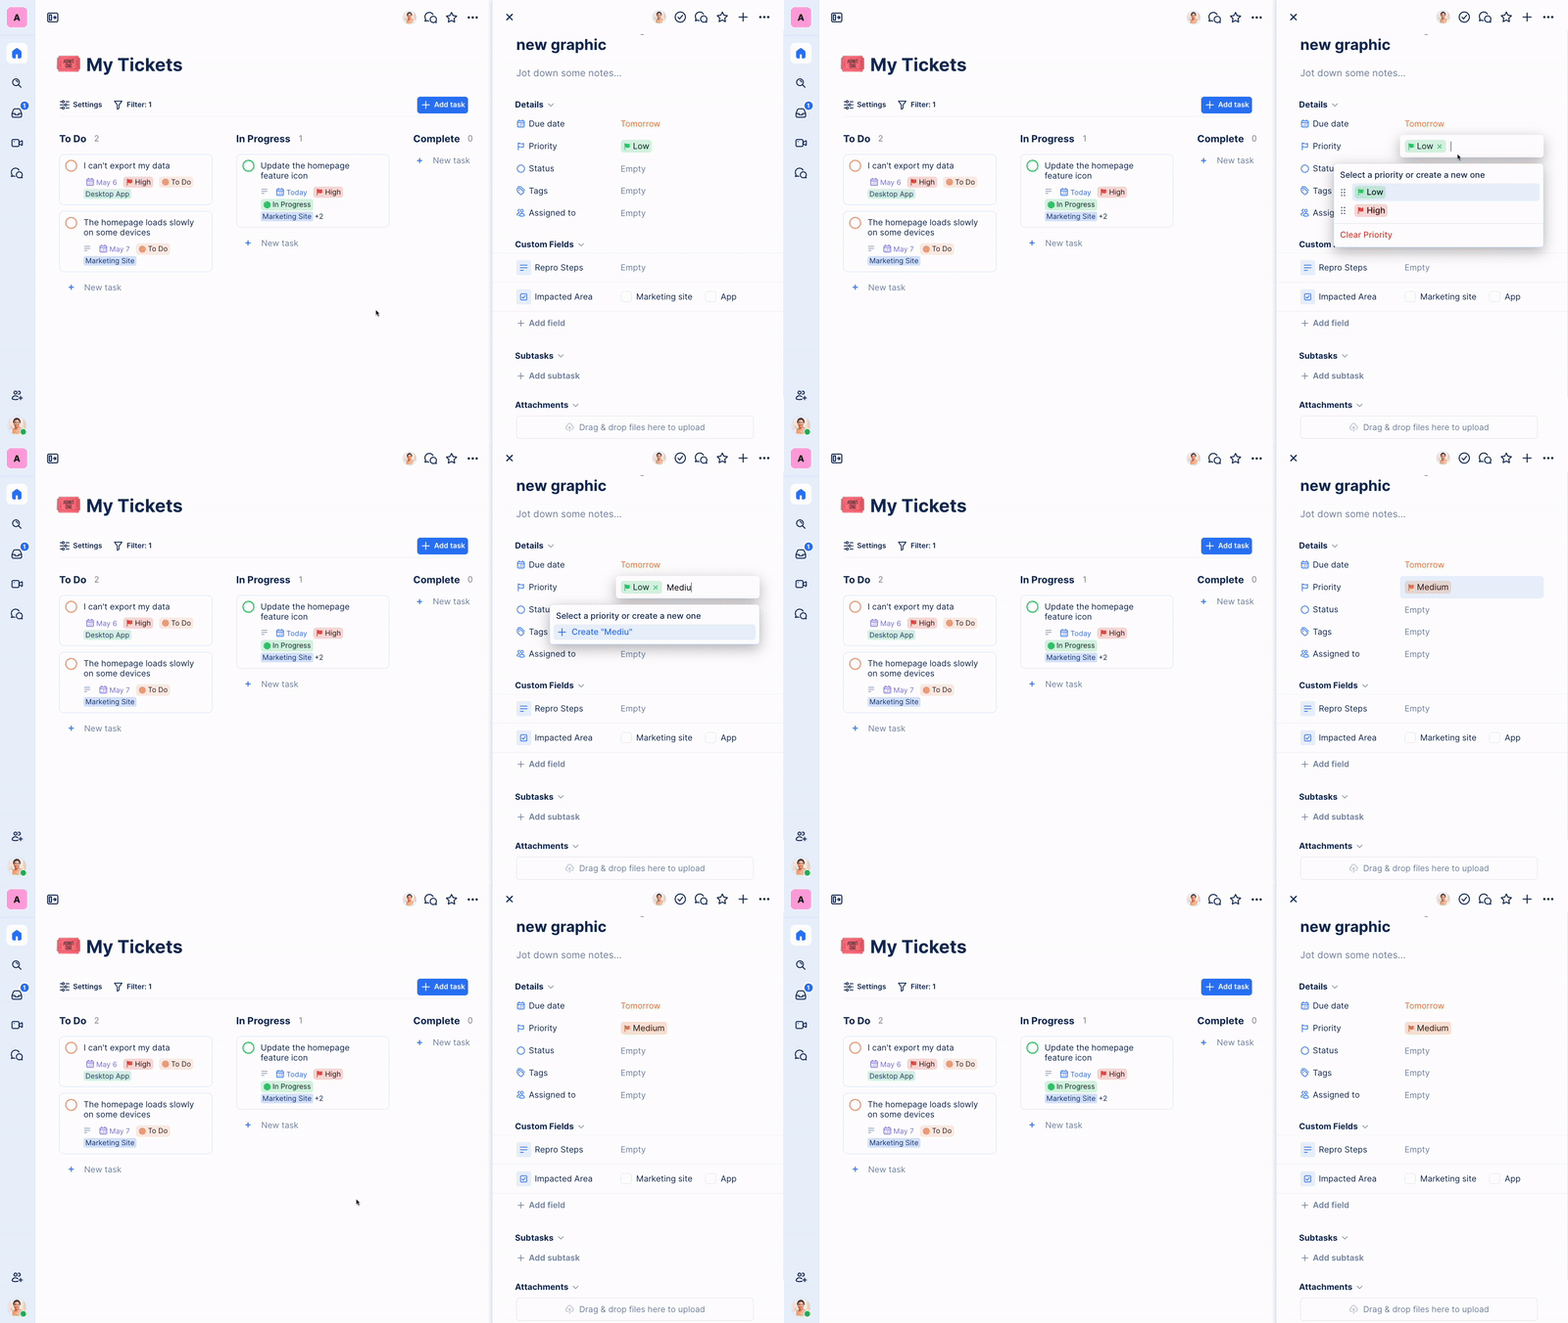
- To create a priority or status, click on Priority or Status (whichever you would like to add an option to)
- This will open a menu with your existing options. Search for the priority or status you would like to create. If an option does not exist with the same name, you can click Create to create the new option.
- The menu will automatically close, save, and apply your newly created option to the task
Editing a priority or status

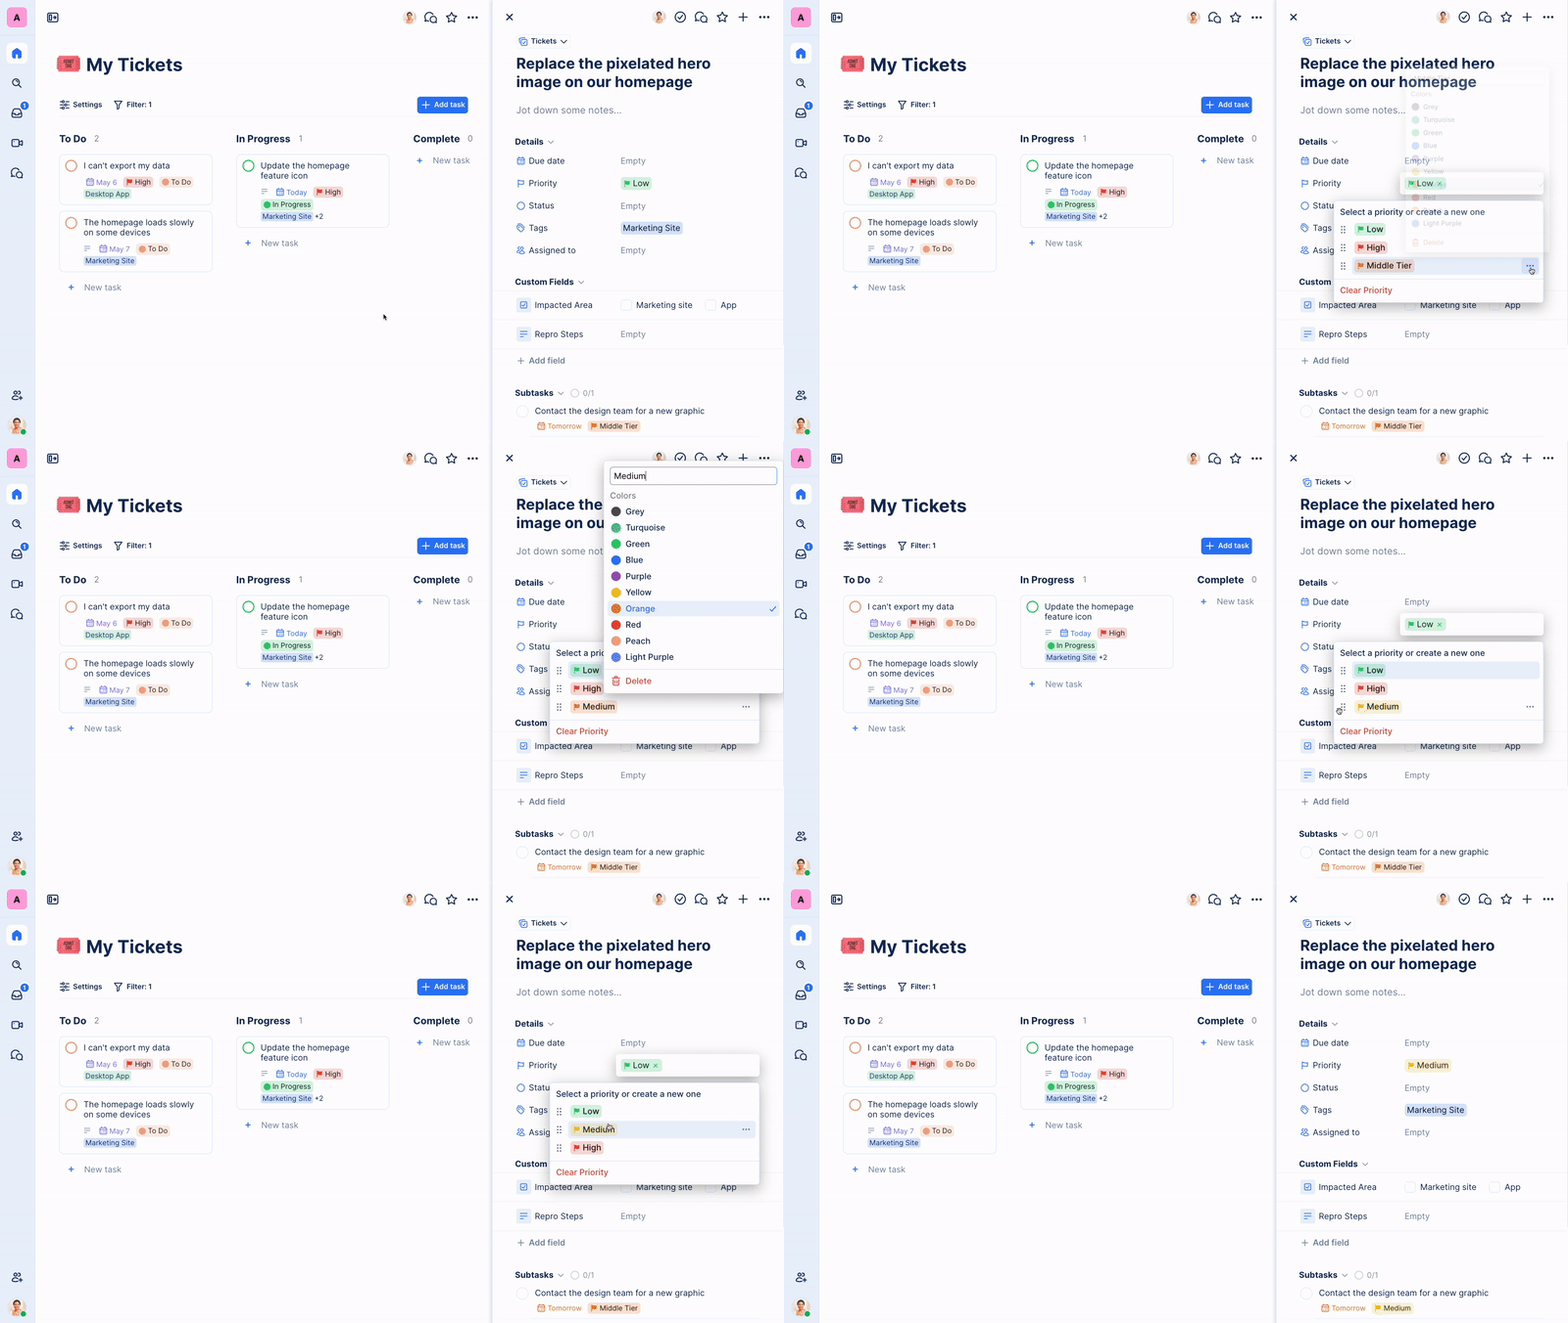
- To edit a priority or status, click on Priority or Status (whichever you would like to edit)
- This will open a menu with your existing options. From here, you can rearrange or edit the options
- Hover over the option you would like to edit and click the ellipsis (…) menu
- After the edit menu opens, you can edit the title and color of the option
- Click outside of the menu to close the edit menu, then click outside of the options menu to save and close your options
Tip: You are able to edit the Completed status, but you cannot remove it.
Using a priority or status

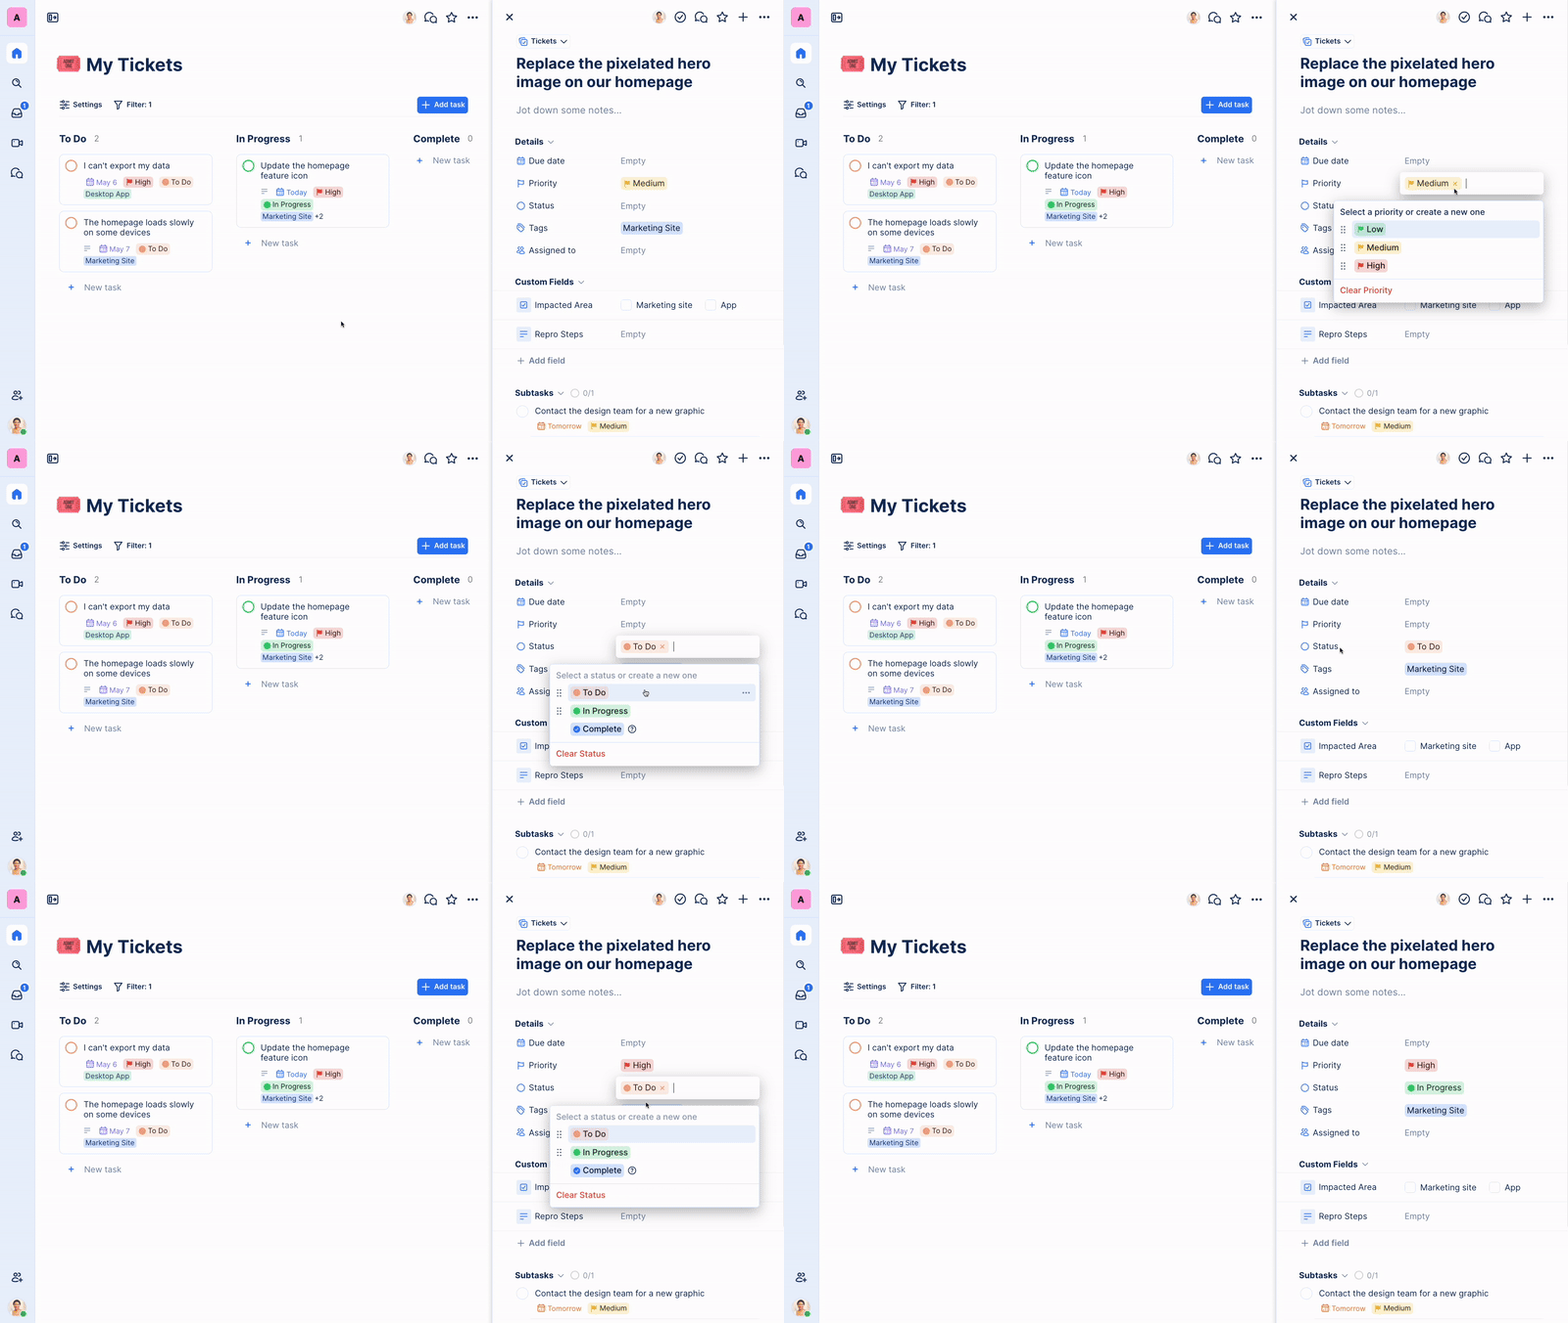
Priorities and statuses are simple to use! Simply click on the field you would like to edit, then choose, search for, or remove the priority or status.
Deleting a priority or status

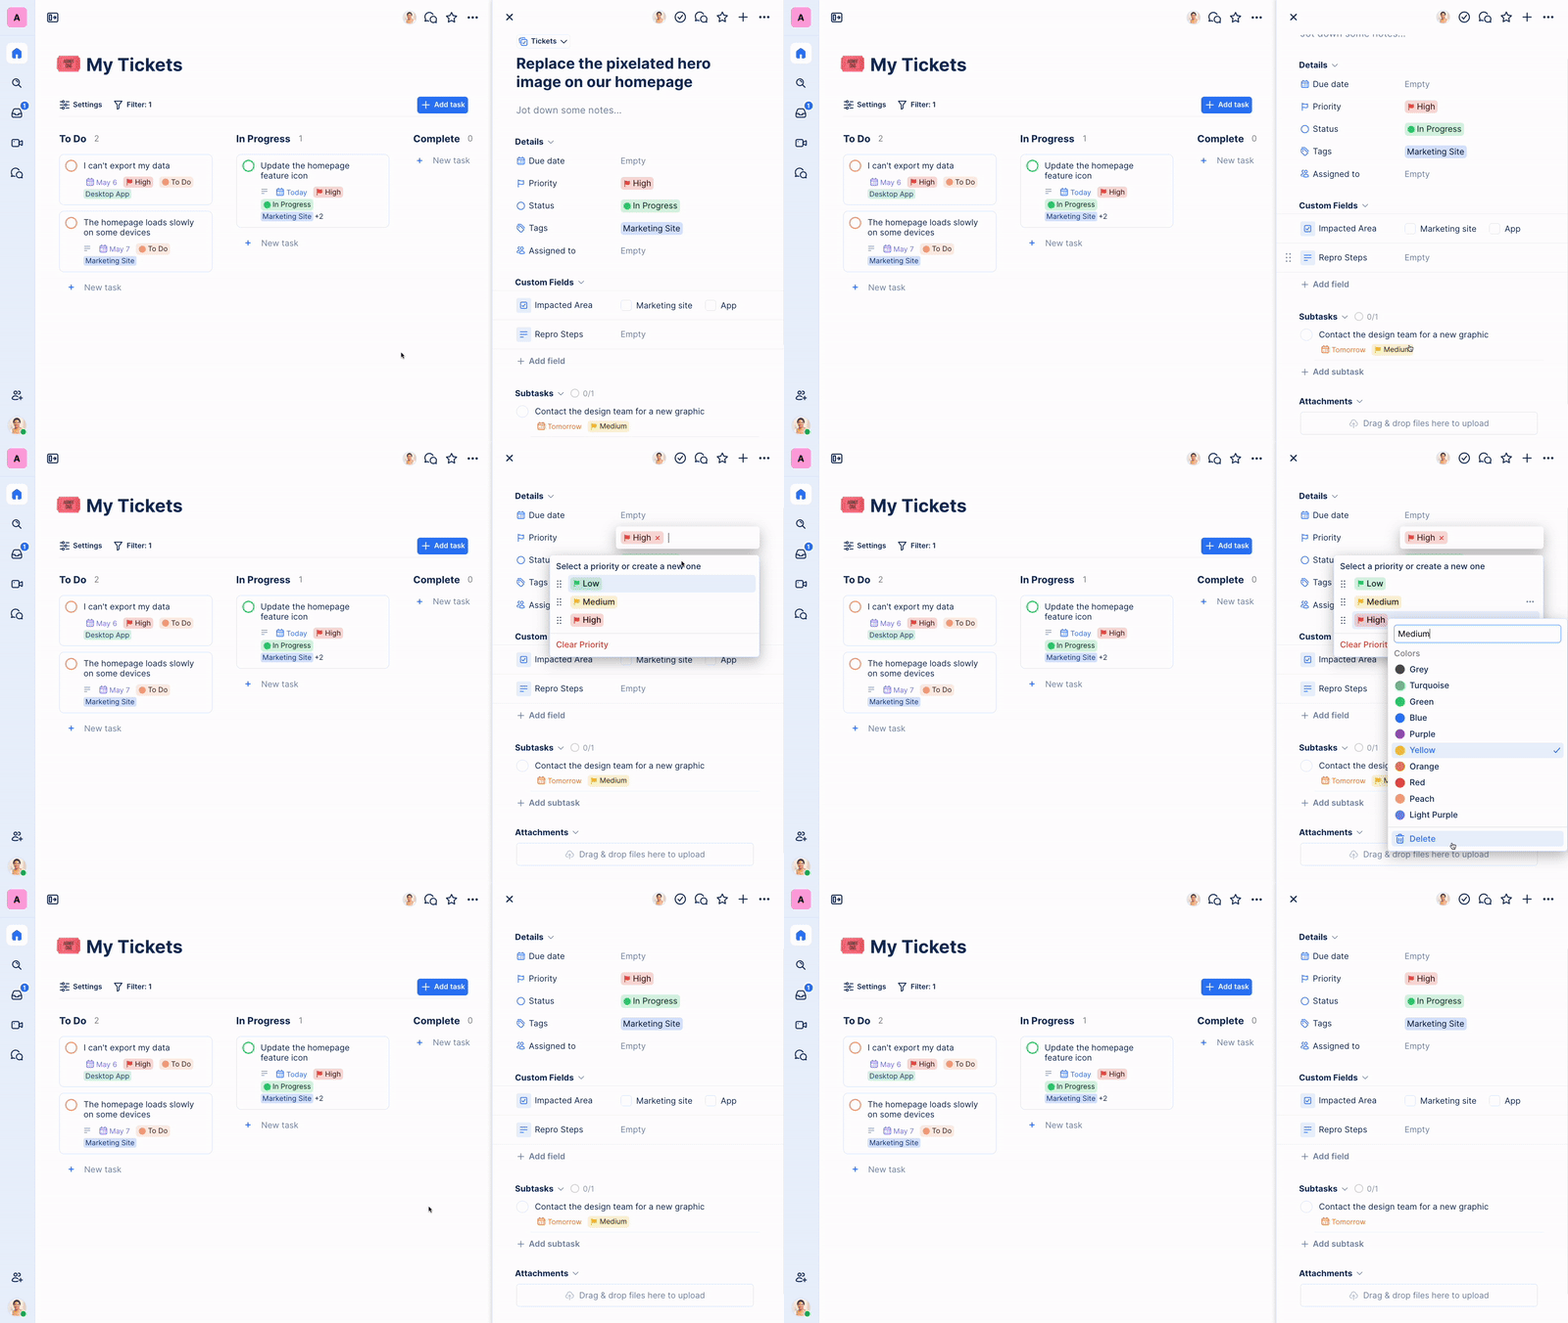
- To delete a priority or status, click on Priority or Status (depending on which one you would like to edit)
- After the options menu opens, hover on the option you would like to delete and click the ellipsis (…) menu
- Click Delete
- Click outside of the options menu to save your changes
Was this article helpful?