Custom fields

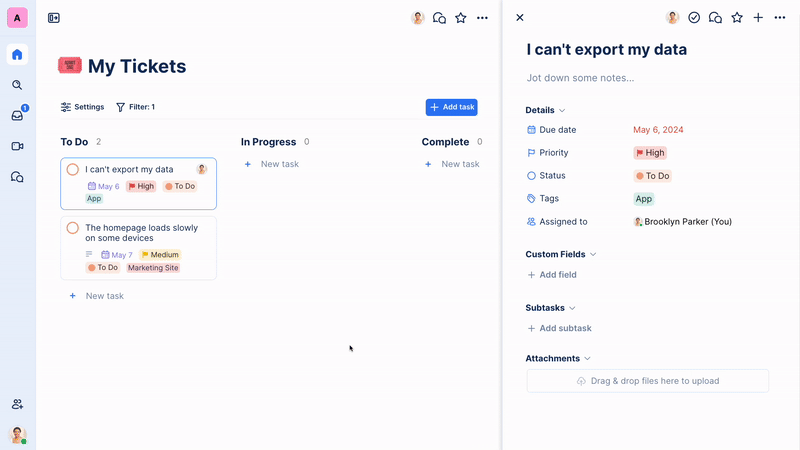
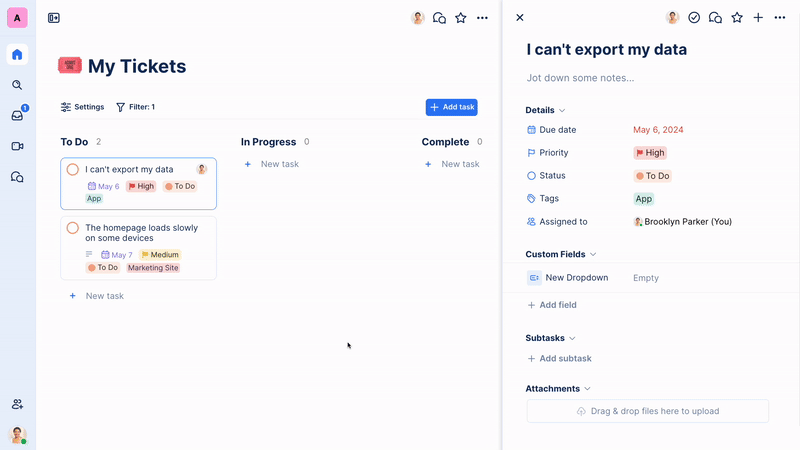
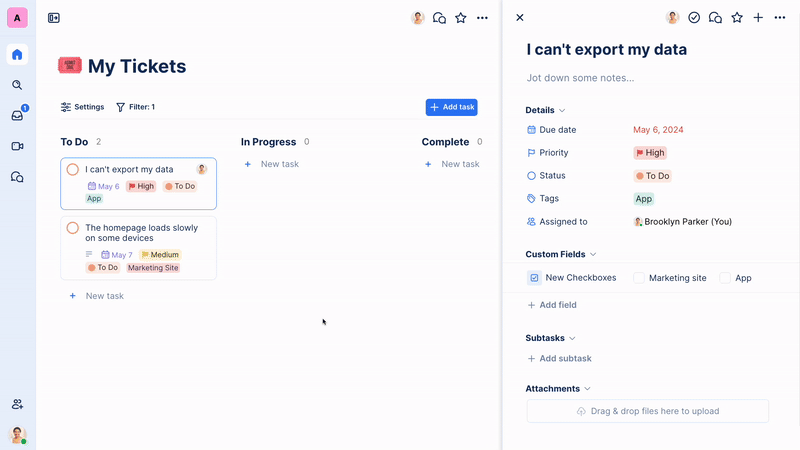
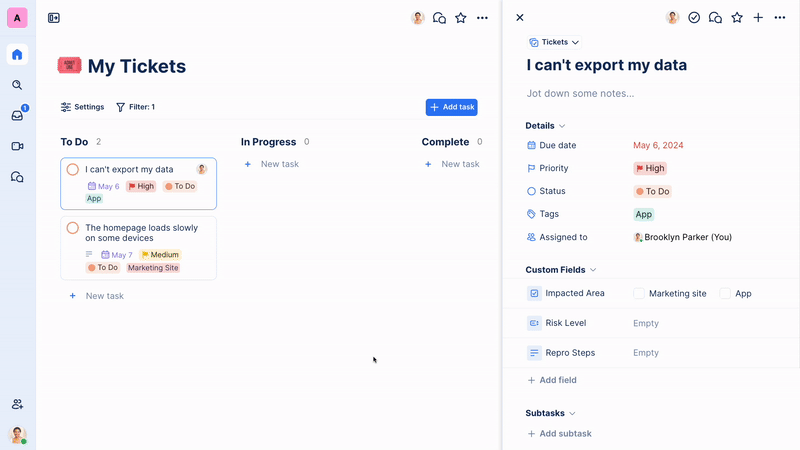
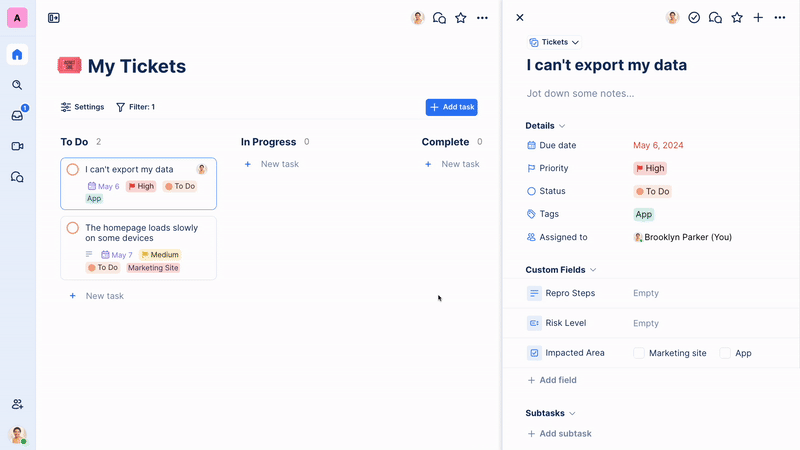
Custom Fields allows you to finely tune TaskOrbiter to your exact needs. While the built in fields, such as notes, tags, and assigning, are great for simple task management, sometimes you need to track even more data about your tasks.

Whether it’s a text field for tracking details about issues, a dropdown to triage your tasks, or even a time field to set specific deadlines, Custom Fields empower TaskOrbiter to meet the needs of your workflow.

How do Custom Fields work?

Custom Fields allows you to track additional information on your tasks. Each Custom Field is saved on a task List, so any task in that same List will also have the same Custom Fields.

A good example of how Custom Fields and Lists work well together are the following:

  • A “Tickets” List, in which all tasks in the List have an “Email” Custom Field, where you can track the email of the customer who reported the ticket.
  • An “Events” List, where each task represents an event, and a “Text” Custom Field is used to track the venue for each event.

The types of fields available are:

  • Text
  • Dropdown
  • Checkboxes
  • Date
  • Time
  • Email
  • Website (URL)

Adding a Custom Field

Animation showing how to add a custom field in TaskOrbiter

  1. To add a Custom Field to your task, click the Add Field button in the Custom Fields section of your task
  2. Name your field
  3. Click outside of the menu to save your changes

Editing a Custom Field's label

Animation showing how to edit a custom field's label

  1. To edit a Custom Field’s label, hover over the label of the Custom Field you wish to edit. After the pencil icon appears, click the label.
  2. A menu will appear with the label text already focused. Enter the label you wish to use.
  3. Click outside of the menu to save your changes.

Editing a Custom Field's options

Dropdown and checkbox Custom Fields require options to be added.

Animation showing how to edit a custom field's options

  1. To add options to your Dropdown or Checkbox Custom Field, hover over the label of the field you wish to edit. After the pencil icon appears, click the label.
  2. When the edit field menu opens, click the Edit Options button.
  3. This will open the edit options menu. From here, you can add, remove, or reorder the options in your field.
  4. Click outside of the menu to close the edit options menu. Then click outside of the menu again to close the edit field menu. The menu will automatically save your changes when it closes.

Duplicating a Custom Field

Animation showing how to duplicate a custom field

  1. To duplicate a Custom Field, hover over the label of the field you wish to duplicate. After the pencil icon appears, click the label.
  2. This will open the edit field menu. Click Duplicate field to duplicate the field. This will open the edit field menu for the duplicated field, where you can rename the label and make any other changes you’d like to make.

Rearranging your Custom Fields

Animation showing how to rearrange custom fields

  1. To rearrange custom fields, hover over the Custom Field you wish to move.
  2. A handle icon will appear. Click and drag the handle icon to move the Custom Field.
  3. Your changes will be saved as you rearrange the fields.

Deleting a Custom Field

Animation showing how to delete a custom field

  1. To delete a Custom Field, hover over the field you wish to delete.
  2. After the pencil icon appears, click the label.
  3. The edit field menu will appear. From here, click Delete field.
  4. Confirm permanent deletion of the field and any data related to the field. Clicking Delete will permanently delete the field and any related data, and it cannot be recovered.
Was this article helpful?